|
|
Please note: MoonLite Only manufactures motorized versions of all of our focusers. We no longer make manual focusers and do not have any left in stock. We are updating our web page to reflect this at this time. All Crayford model focusers come with a choice of 10 different Motor options to pick from that can handle everything from Visual to automated needs. Please check out the new V3 integrated controller style HIgh-Res motor, that is our most popular version.
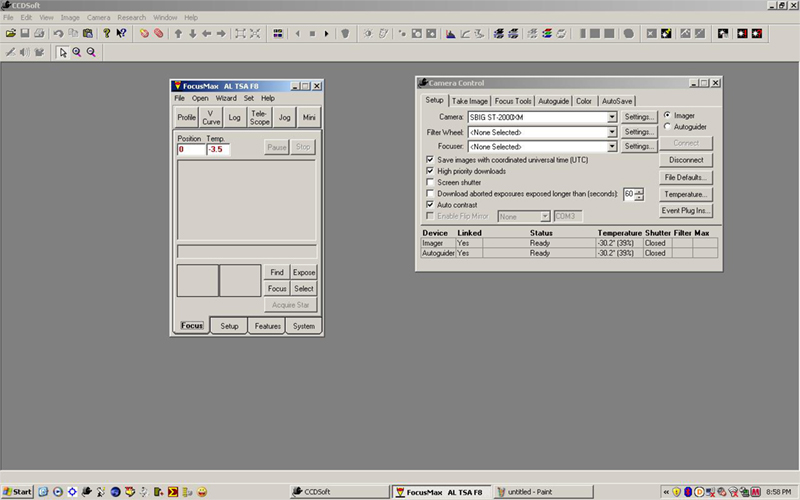
Focus Max Setup
Setting up your MoonLite Hi-res Stepper Motor Focuser to run with FocusMaxThis tutorial will guide you through the initial setup of FocusMax (FM) and its "First Light Wizard". Once completed, you should be capable of "nailing" precise focus. It does not include all the advanced features of FM. There are plenty of internet resources available for advanced features including the FocusMax User Group on Yahoo. Important - This tutorial is specific to a MoonLite Crayford style Hi-res Stepper Motor Focuser only. The numbers provided match our resolution. Also, our focuser will not be damaged by running beyond the focuser limits. Other types of focusers, such as rack and pinion, could be and probably would be damaged if focus limits are exceeded.
This tutorial assumes the following:
Start FM, click on "Jog" and try to move the focuser 1000 steps on either side of your current position. Watch the knob opposite your motor and if it moves, you are ready to start.
Zero the focuser.
To be honest, this step isn't absolutely necessary but I like to do it for 3 reasons:
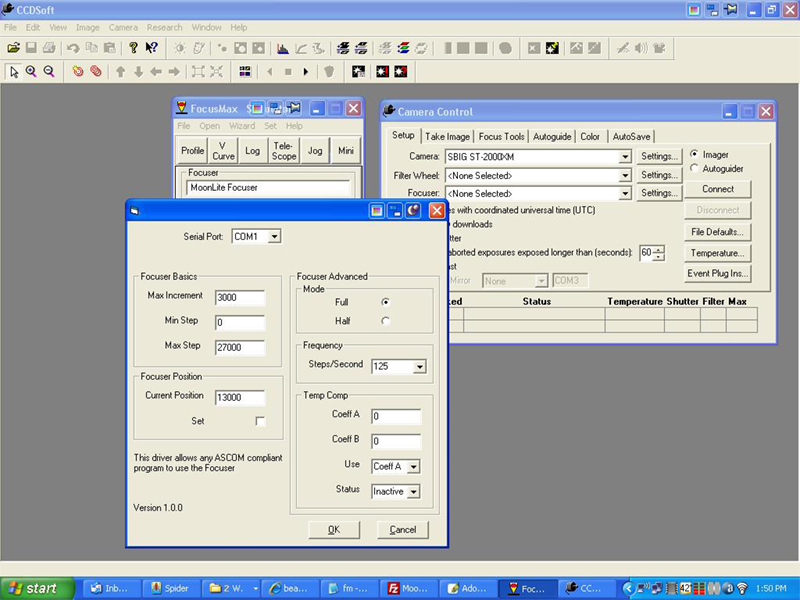
1" of travel = 6135 full steps (you may see this a few times) Our goal here is to seat the drawtube all the way "in" and set the position in FM to zero. So how do we do this? Well that depends on which controller you have. If you have the Digital Read Out (DRO) controller, use the full step buttons and run your drawtube all the way in. Notice the position does not go below zero. If, after seating the drawtube, the DRO is still reporting a positive position, press the 1 and 4 buttons simultaniously to zero the controller. Check FM and it should also show a position of zero. If you have the MoonLite Mini Controller (mini), you will have to use FM to zero your focuser. Use the Jog feature in FM to send your drawtube inward. If seated and FM is still reporting a positive position, you can "zero" FM by clicking System, Setup (under Focuser) put the number "0" in Current Position, check the Set box, and click OK.
At this point your drawtube should be seated against the focuser base and the FM position should read "0".
Finding focus.1" of travel = 6135 full steps
I need to present this in two ways:
Note: For this initial focus step I like to use a bright star, mag 2 or brighter.
SCT's
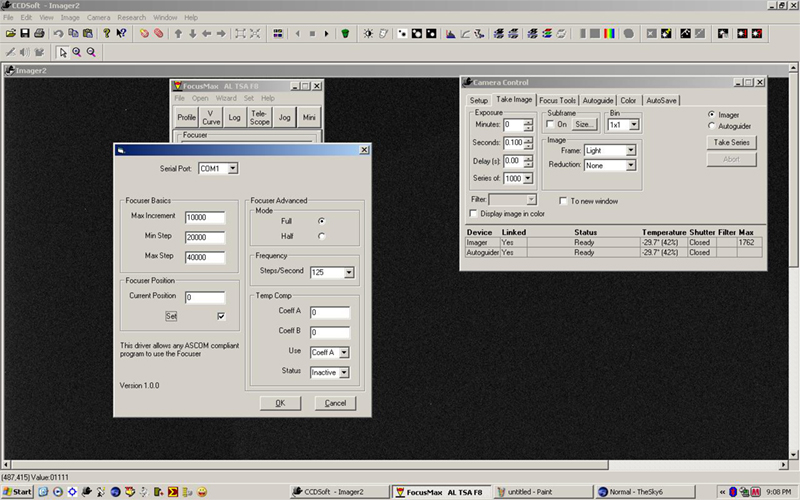
Refractors and Reflectors Example: My TSA 102 f/8 has a drawtube with 4.5" of travel. I slew to Betelgeuse and took a .1 second image. As expected, I was way out of focus at the zero point. So much so, I didn't think it would even show in a screen shot. I instructed FM to Jog out to 7000 steps and took another image:
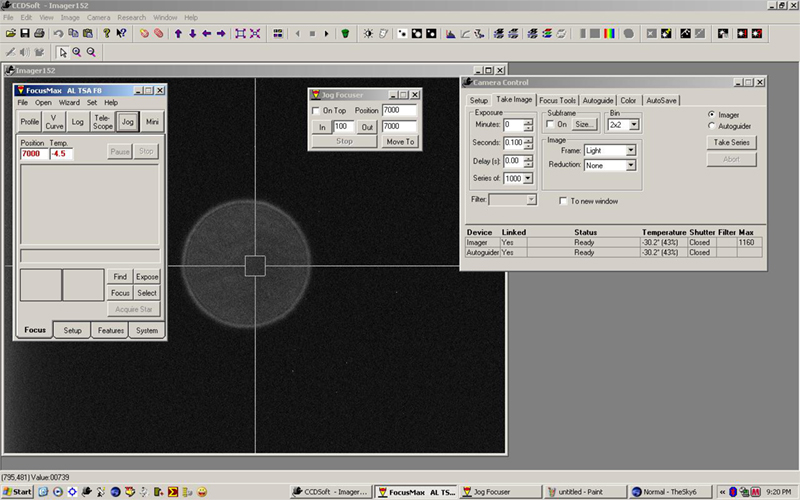
After several more jogs and images, I came real close to focus at 13000 steps:
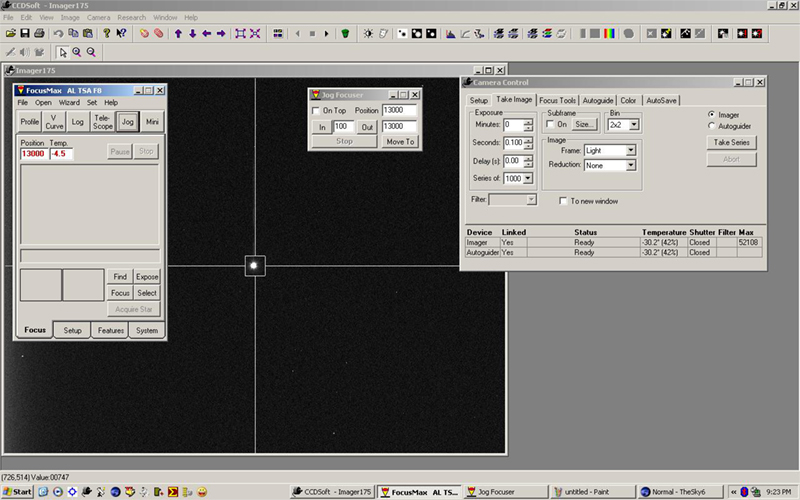
If you remember the formula (1" of travel = 6135 full steps) I am in focus about mid way of my drawtube travel. Also note that I am using one of the two supplied spacers that came with my Tak. You too will have to determine the spacing of your imaging train. Depending on your setup, FM will need 1000 +/- steps on each side of focus to work properly. If you are satisfied with your focus, it's time to slew to a mag 4 star and center. Pick a star well above the horizon where the seeing is the best.
Setting up some initial numbers:
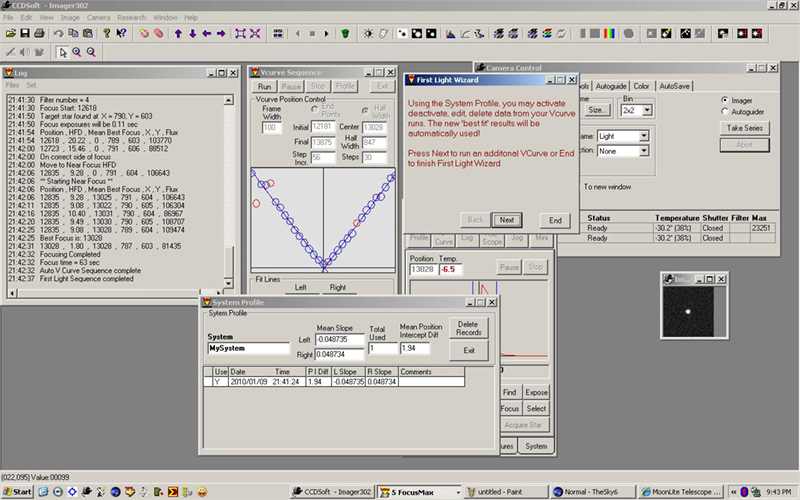
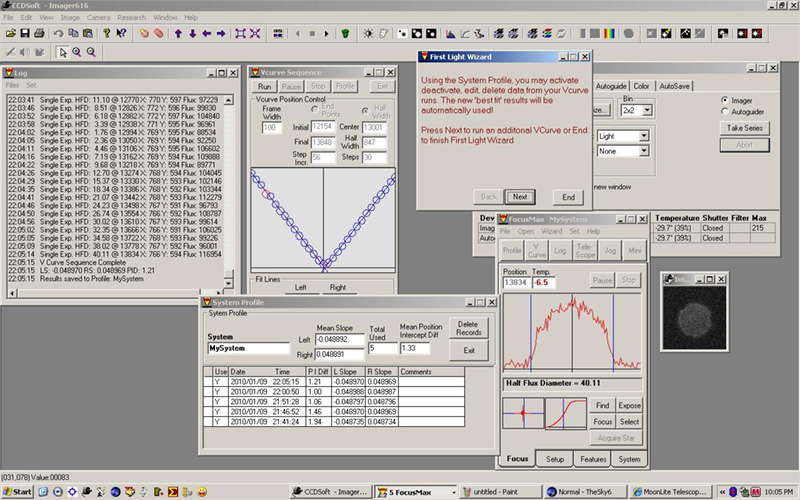
With a mag 4 star centered and roughly in focus, we're just about ready to run our first
V-curve. But before we do, we have to enter some initial parameters:
|